When I was tasked to start work on JavaFx using Scene Builder & Netbeans, I shivered. Because, both were unknown to me then. Google helped but I have come to a point that most of the tutorials were not meant for beginners (they were labelled but they were not in true sense). So, I decided to make a pictorial post of it. Here I start...
Pre-requisites: JRE , Netbeans & Scene Builder installed.
1. Start Netbeans and Open New Project
2. Select JavaFx FXML application , Enter project name (we are using NetbeansJavaFxTest here) and location details & Project is made.
3. Check FXML(Flexible XML) file which is created automatically by Netbeans. If you have Scene Builder installed, double-clicking the FXML file will open Scene Builder but right-clicking and clicking EDIT will open FXML page in Netbeans.
If you double-click the file but Scene Builder doesn't open up, check the integration in Net beans by going into Tools -> Options
4. Run Program by clicking Build and then PLAY button. Output window will appear of the above created project.
Clicking on Button 'Click Me!' will result in showing Text 'Hello World' on screen and 'You Clicked Me!' on output screen in Netbeans IDE.
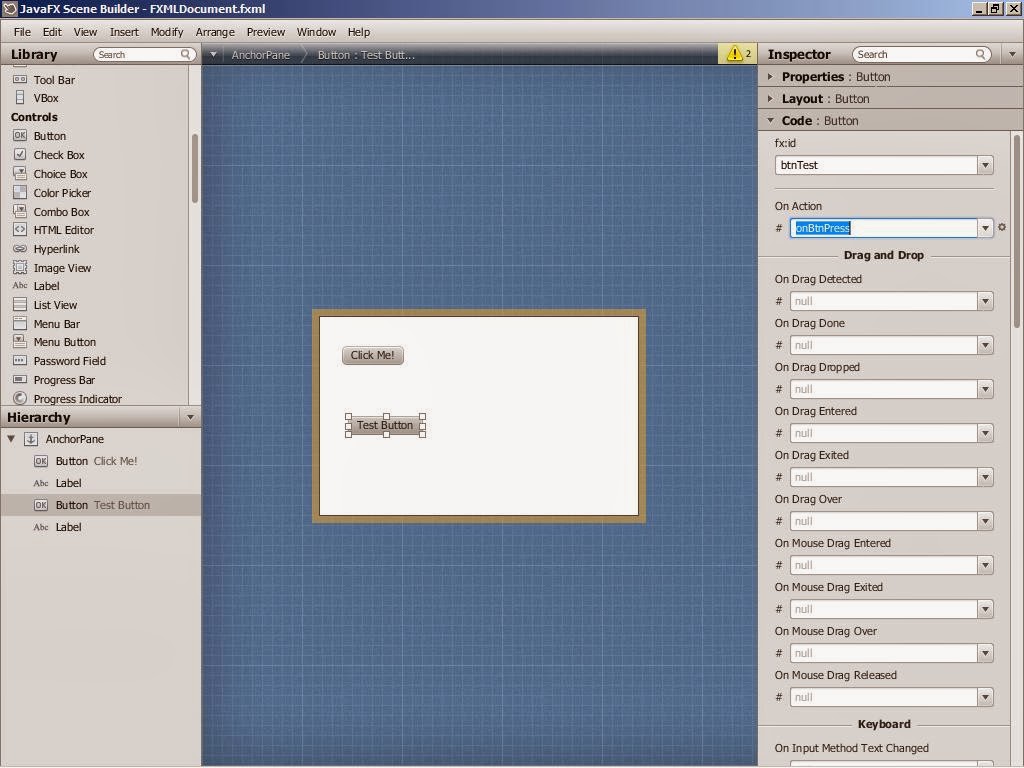
5. Now, its time to start Scene Builder and add some buttons of our own. Here is how Scene Builder Looks like (Remember we went there by double-clicking the FXML file)
6. Add Button and Label from Controls section by Drag and Drop. When you add them to the project, check that they also get listed in Hierarchy pane. Correspondingly, each control has properties which you can change. We will label the button etc as desired.
7. Now give Name & Event association to the control by going into Code section of Properties pane. Here we write 'onbtnPress' event as desired by us. (You can associate already created events but that will be explained later)
8. Check that Yellow warnings appear at the top. Here they mean that the identities and events given to controls are not part of controller (main Class having the events code)
9. Just to check what changes you can expect in Controller class after doing these changes in Scene Builder, you can click on Sample Skeleton and see the @FXML labels, events and methods. Remember, that its just a sample and not the exact code written in background right now.
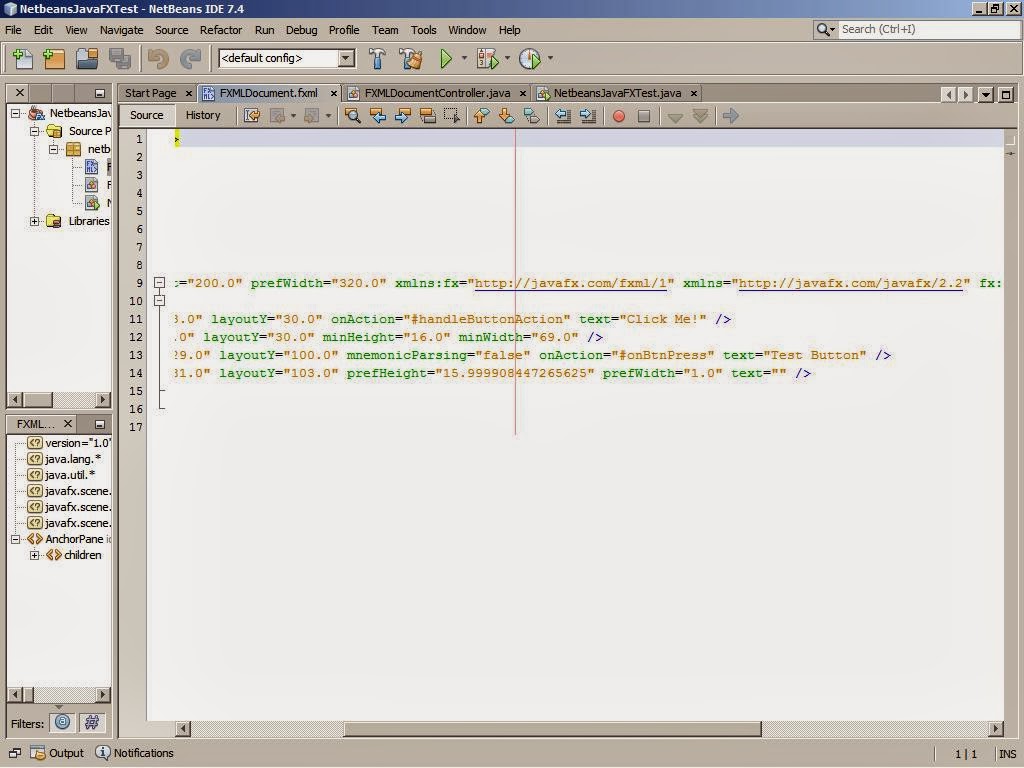
10. Click Save and FXML file is saved. Go to Netbeans and check the FXML file (Edit) and you will find new tags and events added to it. But since they are not mentioned in Controller class so, they will give Error.
11. Here is the magic trick. Right-click FXML file and click on Make Controller. It will add up all the events etc that you made in Scene Builder earlier. If you check the FXML file, it will be having no more Errors after you do the above steps and build it.
12. Now, add the code to the events that you have created (onbtnPress in our case). We will just add Text to the label which was earlier created. Build the program Run it & you will get the output as desired.
That's all for the beginners. Now you know how to make changes to scene builder which gets reflected in Netbeans and how you add them back. For any queries, keep commenting!


I love you, man :) I need to make an easy java GUI app for my class and I have been struggling for countless hours :) That Make Controller thing saved me a lot of time, thanks ;)
ReplyDeletePleasure is all mine.
ReplyDeleteThis helped me a lot.. Thanks a lot Krypton...
ReplyDeleteThanks a bunch. Your pictures really made a huge difference.
ReplyDeleteSystem.Out.println("Peace be with you!";-)
Thanks lot
ReplyDelete